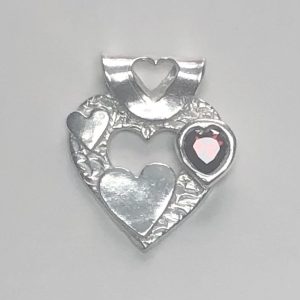
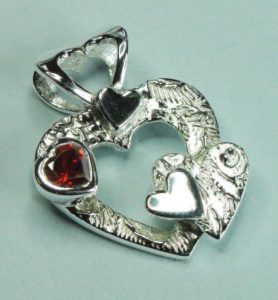
 Queen of Hearts Silver Clay Project
What you need:
Agate/metal burnisher or tumbler polisher
Badger Balm
Clean up cutting and carving tool
Cutters- Heart set of 6
Drinking Straw Large
Heart shaped CZ or round 3-4mm
Paintbrush and cup of water
PMC3 15g silver
PMC3 paste to join components
Roller and 2 x 1.5mm spacers
Rubber block
Sandpaper
Snake roller
Stainless steel brush
Texture mat
To fire: Kiln or Torch Fire
Work mat or Teflon
Make your Queen of Hearts Pendant
Step 1 – Add texture
Rub badger balm on your hands, work mat, texture mat heart cutters, and roller. Place the clay on the Teflon or playing card and roll the clay 1.5mm thick using the roller and spacers. Place the texture mat over the clay, with the edges of the mat on the spacer bars, to stop it squahing into the clay!
Step 2a – Create the heart shape
Cut the main heart shape out using the largest heart cutter aprox 4.5cm. Use a smaller heart cutter to remove the centre and leave the smaller heart aside to dry. Create a variety of smaller hearts if required. Put the excess clay back in the packet to prevent it drying out.
Step 2b – Create the bail
Roll out a flat strip and wrap around a thick straw. You can use a long oval shape, as here or a rectangular shape. Leave the ends of the bail open for now. Now carefully cut out two hearts, with the straw still inside the clay, using the smallest heart cutter. Place the hearts aside. Shape the edges of the bail using the clean-up tool. Leave the bail to dry. Once dry, sand and refine. Your bail should be ‘perfect’ before adding to the rest of the pendant.
Step 3 – Assemble
Once the hearts and the bail are all dry, sand all the components prior to assembling the pendant. Start by adding the bail. Use plenty of paste to attach the bail to the large heart. Place each end over each side of the heart and add paste to the inside join. Next, add the three smaller hearts, carefully using more paste. Dry the heart to secure the components.
Step 4 – Set the CZ
Measure the depth of your CZ, by placing it on your Teflon, with the spaces either side. User the snake roller to roll over the CZ. If the roller can pass over the CZ easily, that is the depth of clay you need to roll to set the stone. If the CZ stops the roller, you will need deeper clay. Try adding playing cards under your spacers, to find the right depth. Once you have sufficient depth for your CZ, roll your clay. Place the CZ into the clay and gently press the CZ into the clay. Use something flat such as a snake roller across the spacer bars, so that you don’t lose the depth. The table of the stone should be level with the clay to ensure the stone holds in place after firing. Dry the CZ, and then attach to the main heart using paste and smooth using a little water with your paintbrush.
Step 5 – Refine
Leave to dry. Fill any gaps with PMC paste and refine with sandpaper or 3M polishing papers. Prior to firing make sure there is no clay left on the CZ as this cannot be removed after firing. Ensure your clay heart is thoroughly dry before firing it.
Step 6 – Fire
You can torch fire your pendant for 4 minutes – see how here or fire your pendant in kiln on the PMC3 full ramp programme (700C/10mins). Once fired, let the kiln cool down. Do not quench your heart as this will damage the CZ.
Step 7 – Polish
Use a stainless steel brush with water to brush your heart and bring it to a silver state. To achieve a high shine finish, continue using a burnisher or place in a tumble polisher with mixed stainless steel shot and 1/3 teaspoon of tumbler soap.
Optional: Use a soft cloth and silver polish to complete your polish.